


“Hey Google, how do I install a basketball backboard brace safely?”
If that’s what you just asked your voice assistant, you’re in the right place. Installing a basketball backboard brace might sound like a job for a professional, but it’s something almost anyone can handle with a little time and the right tools. Whether you’re setting up a new hoop in your driveway or reinforcing an older setup that’s starting to shake, this guide is made just for beginners like you.
In this step-by-step article, we’ll walk through everything you need—from the tools to common mistakes—and keep things simple so you can finish the job without stress. If you’re trying to improve the stability and safety of your hoop, this guide has you covered.
What tools do I need to install a backboard brace?
Before starting your basketball backboard brace installation, gather the following tools and materials. You don’t want to be halfway through the process and realize you’re missing a key piece.
You’ll need:
- Adjustable wrench
- Level
- Concrete anchors (if installing on an in-ground pole)
- Anchoring bolts
- Drill and drill bits
- Socket set
- Screwdriver
- Ladder
- Safety gloves
- Safety glasses


Most of these are common household tools. If you’re missing something like concrete anchors, they’re easily available at any local hardware store.
Step-by-Step Installation Guide
This is where your basketball backboard brace comes to life. We’ll walk through each step to help you safely and properly install it—without overcomplicating things.
1. Pre-Installation Safety Check
“Can I install a backboard brace alone?”
Yes, but having someone to assist is safer and faster. Before you begin:
- Check the stability of the pole. If it wobbles or is leaning, pause the installation and fix that first.
- Wear safety gloves and glasses. They’re not just for pros—one loose bolt can cause injuries.
- Make sure your ladder is on solid, level ground.
2. Attaching the Brace to the Backboard
“How do you connect a brace to a basketball hoop?”
This step depends on your backboard type. Most braces come with clear instructions, but here’s the general process:
- Step 1: Align the brace arms with the pre-drilled holes on your backboard. If they don’t match, double-check your brace model.
- Step 2: Insert the bolts through the mount holes and tighten evenly. Avoid over-tightening to prevent cracking the backboard or damaging the threads.
- If your backboard is made of acrylic or polycarbonate, be extra careful. Uneven pressure can lead to fractures.
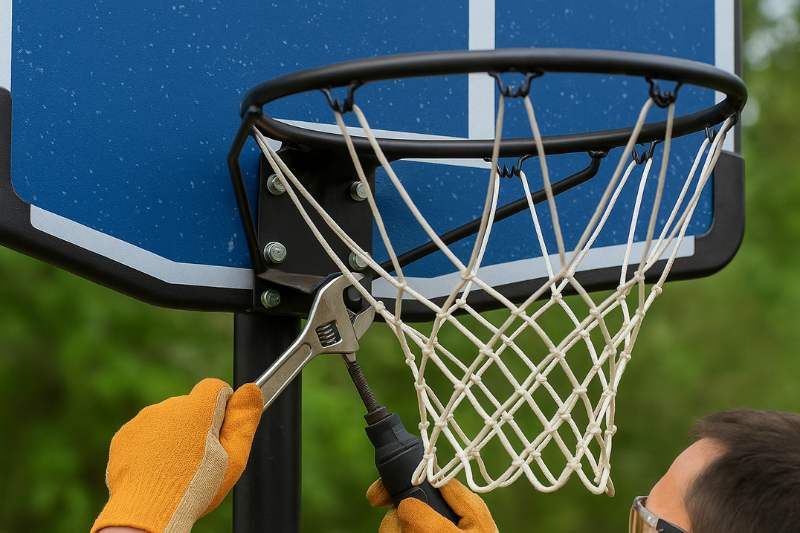
3. Securing the Brace to the Pole
“How tight should backboard brace bolts be?”
Once the brace is connected to the backboard, the next step is to secure it to the pole:
- Use a level to ensure the brace is straight. This prevents slanted backboards that throw off your game.
- If you’re using torque specs, refer to the manufacturer’s guide. Too tight and you’ll strip the bolts; too loose and it won’t hold.
- For in-ground poles, use concrete anchors if there are no pre-drilled holes. Mark the drill points, pre-drill carefully, and secure the brace using the appropriate bolts.
And that’s it. You’ve installed a basketball backboard brace.
Common Mistakes to Avoid – What ruins a backboard brace installation?
It’s easy to rush through the job and miss small details. Here are some common mistakes that beginners should avoid:
- Skipping the level check
→ Results in a tilted backboard that affects shooting accuracy. - Over tightening bolts
→ Leads to stripped threads and weak support. - Using the wrong anchors
→ Causes instability over time, especially in outdoor setups. - Not checking pole condition
→ A brace on a rusted or bent pole won’t help much. - Installing alone without checking alignment
→ You may think it’s tight and stable, but it could shift once the hoop is in use.


Avoiding these mistakes will help extend the life of both the brace and your basketball system.
How do I maintain a basketball backboard brace?
Even after a proper installation, your brace needs care. Think of it like maintaining a bike—just a little effort keeps it running well.
- Inspect bolt tightness every 3 months. Outdoor weather can cause them to loosen.
- Look for rust or corrosion, especially if you live in a humid or coastal area.
- If bolts seem worn, replace them right away—don’t wait for them to snap under pressure.
- Clean the brace and backboard occasionally to remove dust and debris.
- Apply anti-rust spray if your setup is metal and exposed to rain.
Regular checks help you extend the lifespan of your basketball hoop and avoid sudden failures during play.
Frequently Asked Questions
Can I install a brace on an existing hoop?
Yes, as long as the pole has pre-drilled mounts or you are able to drill anchor holes. Older systems may need some custom fitting.
Do portable hoops need braces?
Not usually. Most portable hoops are built for flexibility and movement. Bracing them can limit their purpose and possibly cause stress damage.
How long does a backboard brace last?
With proper care, a quality basketball backboard brace can last over 5–10 years.
Can I paint the brace to match my hoop?
Yes, just use rust-resistant outdoor spray paint. Make sure to clean the brace first and let it dry fully before use.
Conclusion
Installing a basketball backboard brace isn’t just about tightening bolts. It’s about making your hoop safer, stronger, and more enjoyable. Whether you’re helping your kids get better at their free throws or just reliving your own court dreams, a solid brace means more fun and fewer problems.
Need a pro? Just say “basketball hoop installers near me” to your voice assistant.
If you finished the installation yourself—great job! Don’t forget to share your setup online or with friends. You might inspire someone else to get their system upgraded too.
